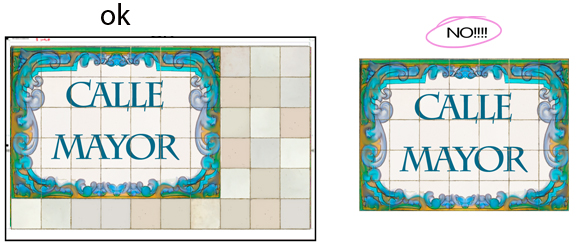
In the image on the left, you can see a model of a complete template, just as you will receive it (in some models this aspect may vary)
DO NOT MODIFY ITS FORMAT AND DO NOT MOVE ANYTHING!!!!!!!
If we send it to you vertically, horizontally, with margins… DO NOT MODIFY IT!!!!!
You can change the colors, add drawings, remove and add layers, change their transparency, but NEVER move them up or down or left or right!!!!
a) do not cut the templates
b) do not send them to us together
c) file format
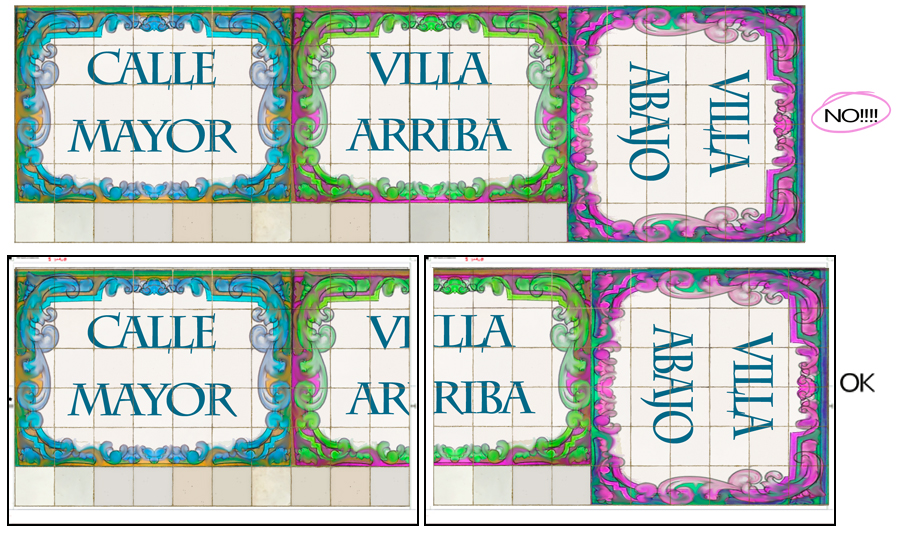
a) Always send us the complete sheet, REGARDLESS of what it contains. The part that you are not going to take advantage of, you will have to cut it, but for us it is a single indivisible piece

b) Make the most of the entire surface of the plates!!!!
In the montage, you will see that 3 drawings fit in 2 plates. But when you send us the template, do not do it with the plates joined together!!!!!
In the image below (OK) you will see how you have to send them to us

c) You work the template as best suits you; use the layers you want, flatten them as you want during your design work… but when you finish, you have to send us the template in a single layer and in JPG format.
The size, exactly in the same one in which we have sent it to you: 175 dpi
Send us your finished template by WeTransfer
Above all, you save a file with all the layers, because if there is an error and you do not keep an unflattened copy, it will be very difficult to make adjustments without having to repeat all the work.
VERY IMPORTANT!!!
When you talk to us, remember that the plank on the left IS NOT 4 planks. It is a single plate.
For us, both the one on the right and the one on the left are a unit, since the drawings it contains are not relevant to count them.
Although it seems obvious, if we use the same “language” it is much easier to understand each other!!!!!!


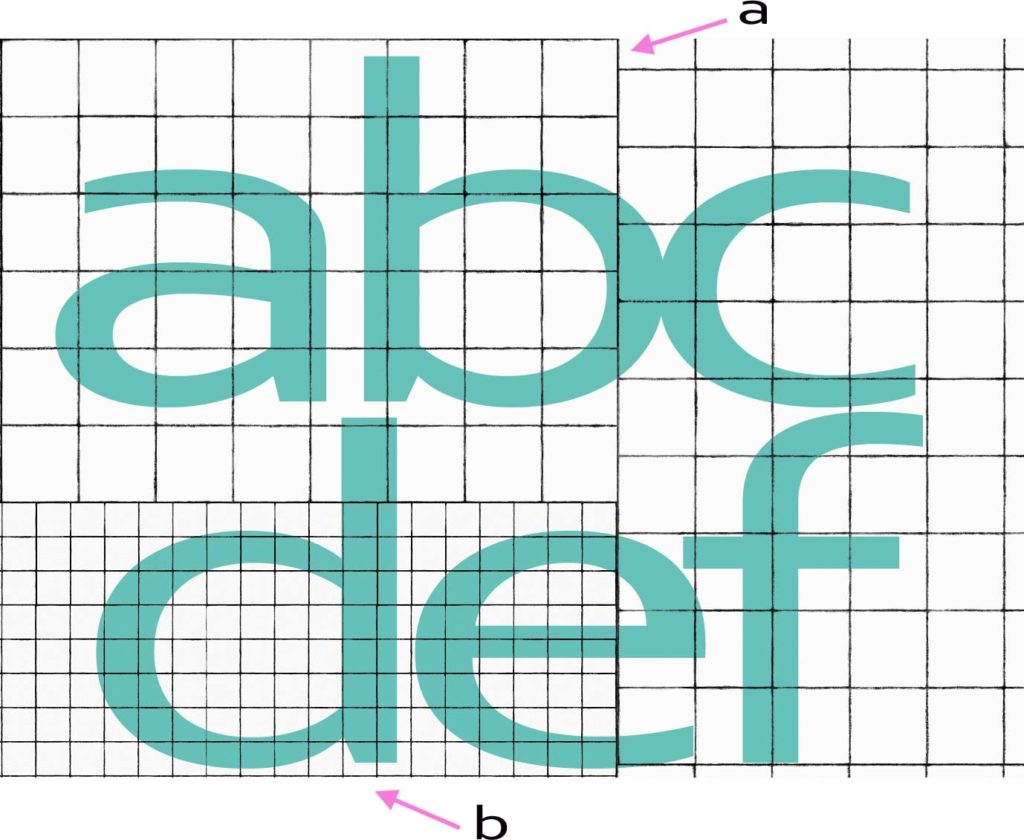
If you want to make a montage with different models of tiles you can do it. In fig. on the left, you will see that arrow “a” indicates a placement with the 15 x 15 tiles displaced from each other, and arrow “b” shows you that part of the assembly is done with tiles of another model (10 x 10)
As our plates are always whole and only have one tile format in each of them, you will have to make a “puzzle” so that when the plates arrive you can cut them out and assemble them as you wish.


In this case, with 3 plates you will have enough. In pink we indicate the material that you will have left over, the combination that we show you is just one way of doing it… look for other ways of doing the work in which you take advantage of the material as much as you can!!!!!
©2024. laWALL. All rights reserved.